
|
|
PREPARING SHOES FOR CLASS |
| You are in: HOME > SHOES ASSESSMENTS FITTING > PREPARING SHOES FOR CLASS |
|
HOME JUON SYSTEM WORKSHOPS SHOES ASSESSMENTS & FITTING TRAINING & FITTING COURSE FITTING CENTRES NEWS LINKS TESTIMONIALS CONTACT US ARCHIVE |
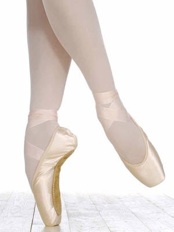
This page is for the dancer who is already to be fitted with pointe shoes. Remember that correctly fitting pointe shoes will save your feet.
|
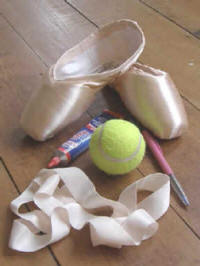
Sewing
on the ribbons
Click here to see how to sew on ribbons Tying the ribbons
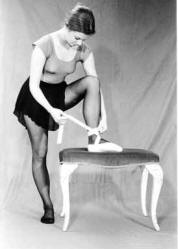
Rubbing a
bit of rosin on the heel of the tights and then pulling the heel
of the shoe over will also stop the slipping of the heel of the
pointe shoe.
Never sew elastic or anything else at the back of the pointe shoe as it will cause thickening of the Achilles tendon, which must be avoided at all cost. Draw strings in Grishko pointe shoes A correctly fitted Grishko pointe shoe does not require a draw string. This will be removed at the end of the fitting. Tightly drawn strings can damage the Achilles tendon. Darning pointe shoes Darning the platform of the shoes helps to protect the satin, and should stop you from slipping. Use a thin but strong crochet cotton in a pale pink. Attach base lines across the width of the platform of the pointe shoes. Use these base lines to anchor the basic blanket stitch across them until the whole platform has been covered. Crochet toe caps can be fixed onto the platform with double sided sticky tape, but make sure the entire cap is fixed securely to the platform.
|
Breaking in Grishko pointe shoes Please do not abuse these beautiful shoes! They have been designed to support the foot anatomically correctly and are made entirely out of natural, environmentally friendly materials. They will respond to the warmth of your feet. Sew the ribbons on first, slip into your shoes in the correct alignment, tie the ribbons correctly and put a pair of warm woollen socks over them. Now all you need to do to is simply walk in them and wear them at home. Then, after a few hours, take them off carefully, mark them Right and Left and hang them up to dry! Check your feet for red marks, and if there are any, remember where they are. Before going to class you should cover these places with protective tape. The tights will rub on the tape and not on your skin. In class, under the watchful eye of your teacher, begin wearing your pointe shoes only at the barre, just like your demi – pointe shoes. You can start doing pointe work once the demi–pointe position has been fully established. If the pointe shoes have been fitted correctly and you have followed our advice on preparing your shoes and feet for class you should not have bleeding toes. Hanging out to dry
When you get home, REMEMBER to take them out of your dance bag and hang them up to dry. Drying your shoes after every time you have used them will make them support your feet for longer on pointe.
|
|
|
|
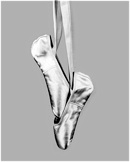 After
you have worn or danced in your pointe shoes, please hang them on the
barre until the end of the class.
After
you have worn or danced in your pointe shoes, please hang them on the
barre until the end of the class.